Why Roof Valleys Leak More Often Than Any Other Part of a Roof
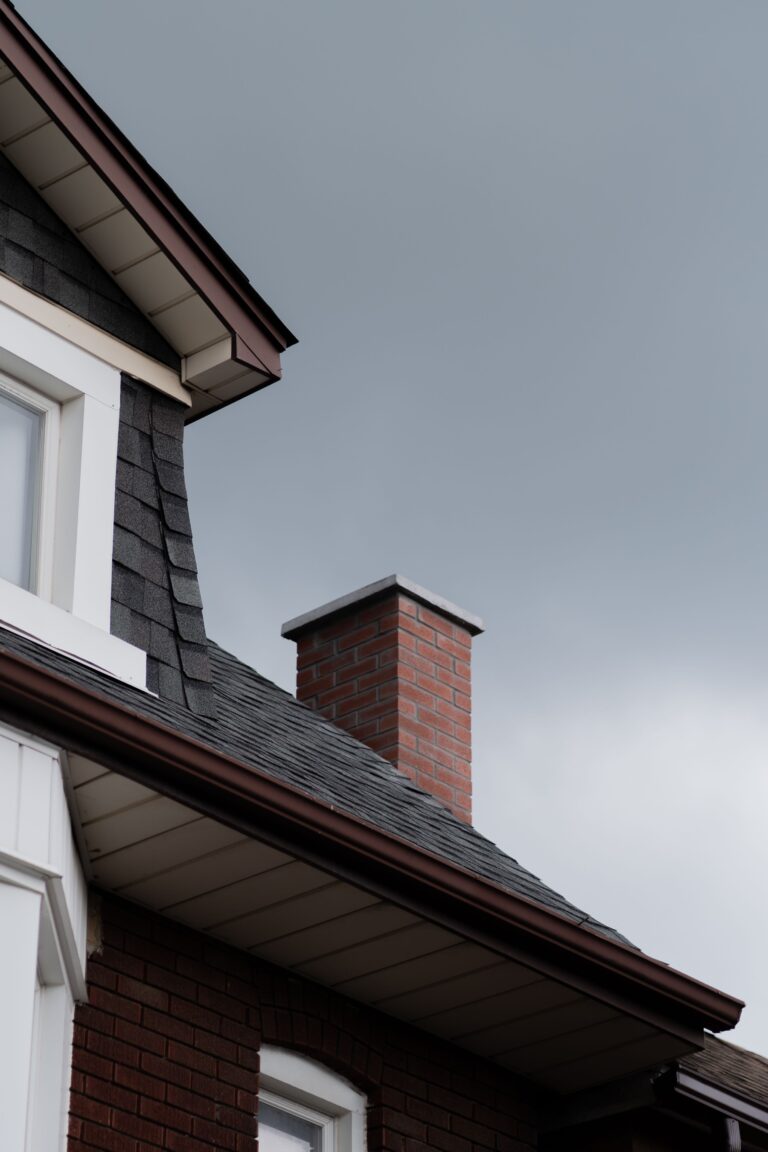
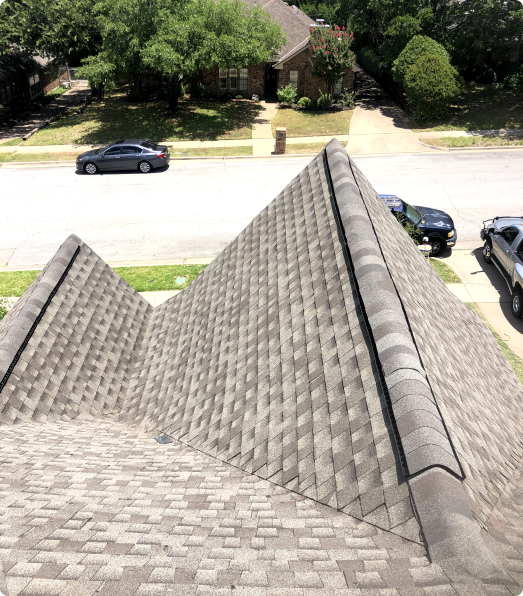
A roof valley is the angled channel formed where two roof planes meet, and it carries more water per square foot than any other surface on your home. Every drop that lands on both adjoining slopes funnels into that single line, gains speed, and races toward the gutter. That concentration of water is exactly why valleys fail first. Late summer storms across North Texas drop an inch of rain in twenty minutes, and a valley that is slightly out of specification will show it immediately. Homeowners in Bedford, Hurst, and Colleyville often assume a ceiling stain sits directly under the hole that caused it, but valley leaks travel along rafters and decking before they ever show up inside. The materials in a valley also age faster because moving water strips granules from asphalt shingles and works fasteners loose over time. Add wind driven rain, hail impact, and years of accumulated leaf litter, and the valley becomes the single most likely failure point on a residential roof. Understanding how valleys are built, how they fail, and what warning signs appear early gives you a real chance to stop a small problem before it becomes a rotted deck and a damaged ceiling. The good news is that valley leaks follow predictable patterns, and most of them are repairable when caught in the first season.
What Makes Roof Valleys Leak More Than Other Roof Areas
Roof valleys leak because they combine high water volume, complex layering, and a dozen small installation details that must all be correct at the same time. A field shingle only has to shed water downhill. A valley has to redirect water sideways, resist water climbing under the shingle edge, hold up against debris dams, and stay watertight where two different roof planes move at slightly different rates. Building code recognizes this risk and requires additional valley lining under the shingles, but code is a minimum standard rather than a guarantee of performance. When a valley is built with the wrong width, the wrong fastener placement, or the wrong metal profile, water finds the weak point within a few storm cycles. Texas heat compounds the issue by cycling shingle sealant strips through expansion and contraction all summer. The three failure categories below account for the overwhelming majority of valley leaks our crews find on inspections.
How Water Volume Causes Roof Valleys to Leak
Water velocity is the hidden force behind most valley failures, and it is easy to underestimate until you watch a valley run during a heavy downpour. Two roof planes each measuring several hundred square feet can dump their entire catchment into a channel roughly two feet wide. That volume moves fast enough to lift the edges of adjacent shingles and push water uphill against the lap. Roofers call this capillary action and crossover, and it is the reason valley details include extra width and sealed edges. On a home where the two slopes have unequal pitch, the steeper side sends water across the centerline and drives it under the shingles on the shallower side. A W profile valley metal with a raised center rib exists specifically to stop that crossover, and its absence on an unequal pitch valley is a defect we see constantly. Over years, that same velocity scours granules off the shingle surface along the valley line, exposing the asphalt mat to ultraviolet damage. Once the mat is exposed, the shingle becomes brittle and begins to crack along the cut edge. What started as a design detail turns into an open seam.
Granule loss in a valley also changes how the roof sheds water going forward. Smooth, worn asphalt allows water to move even faster, which accelerates the wear on everything downstream. You can often spot this from the ground as a shiny or darker stripe running down the valley while the rest of the roof still looks textured. Homeowners frequently mistake that stripe for simple discoloration or algae. In reality it is the roof telling you the valley has aged past the rest of the system. On roofs that are fifteen years old or more, the valley will commonly have five to eight years less service life remaining than the field shingles around it. That mismatch is why partial valley repairs are so common on otherwise healthy roofs. A competent contractor evaluates the valley separately rather than assuming the whole roof shares one condition.
Volume problems get worse when the valley terminates poorly at the eave. A valley should discharge cleanly into a gutter that is sized and positioned to catch a concentrated stream, not a slow trickle. When the valley dumps past the back of the gutter or overshoots the front lip, water sheets down the fascia and behind the gutter board. That constant wetting rots fascia, soaks soffit material, and eventually finds its way into the wall cavity. Many homes need a valley diverter or an oversized outlet at that termination point to handle the flow. If your gutters overflow at the same corner every single storm while the rest of the run stays clear, the valley is the reason. Having gutters and valley terminations evaluated together solves the problem far more reliably than cleaning alone. Dealing with overflow at a valley termination? Click here for our gutter services.

Why Debris Buildup Makes Roof Valleys Leak
Valleys are natural collection points for leaves, pine needles, seed pods, shingle granules, and roofing debris, and every one of those materials holds moisture against the roof surface. In neighborhoods around Grapevine, Southlake, and Flower Mound with mature oaks and pecans, a valley can accumulate a compacted mat of organic material in a single season. That mat acts like a sponge, keeping the shingle edges damp long after the storm ends. Constant moisture breaks down the asphalt binder and encourages fungal growth under the shingle laps. Worse, a debris dam backs water up and forces it sideways under the shingle courses instead of down the channel. Water only needs to sit still for a short time to find a nail hole or an unsealed lap. On closed cut valleys, the debris also traps water directly against the exposed cut edge, which is the most vulnerable line on the entire roof. Homes with a second story roof draining onto a lower valley collect debris at double the normal rate.
Debris damage tends to reveal itself in stages. First you get staining and moss along the valley line, which many homeowners ignore because it looks cosmetic. Next the shingle edges begin to curl and lift slightly as the mat absorbs and releases moisture through heat cycles. After that, the underlayment beneath takes over as the last line of defense, and it was never designed to be a permanent water barrier. Once the underlayment fails at a fastener penetration or a lap, water reaches the decking. Plywood or OSB decking swells, loses fastener holding power, and begins to delaminate. By the time a ceiling stain appears inside the home, the decking under the valley has usually been wet through several storm cycles. This is why a valley cleaned twice a year outlasts a neglected one by a wide margin.
Cleaning a valley correctly matters as much as cleaning it at all. Pressure washing a valley strips granules and drives water backward under the shingle laps, which creates the exact leak the homeowner was trying to prevent. Walking a valley to clear debris crushes shingle edges and can fracture aged asphalt in cold weather. Metal tools scrape protective coatings off valley metal and open the door to rust. The right approach uses soft tools, careful footing on the field shingles rather than in the channel, and a rinse that runs downhill only. Professional crews also inspect what the debris was hiding, because a cleared valley often reveals cracked sealant, exposed fasteners, or lifted shingle corners. That inspection is the real value of the service. Clearing debris without checking what is underneath only postpones the discovery of the actual problem.
Common Flashing Mistakes That Make Roof Valleys Leak
Flashing errors are the leading installation cause of valley leaks, and most of them come down to fasteners placed where they should never be. Nails driven within six inches of the valley centerline sit directly in the path of moving water. Every one of those penetrations is a potential entry point once the sealant around it dries out. Valley metal should be secured at its outer edges with clips or nails placed at the outside margin, never through the center of the pan. We regularly find valley metal face nailed straight down the middle by crews rushing a job. Another frequent error is failing to hem the outer edges of the valley metal, which allows water riding the edge to wick underneath by capillary action. Panels that are lapped in the wrong direction, with the upper piece behind the lower one, funnel water directly under the roofing. Laps also need to be a minimum of several inches with sealant between them, and short laps show up as a leak at a very specific spot partway down the valley.
Underlayment shortcuts in the valley are just as damaging and much harder to see after the roof is finished. Code calls for valley lining beneath the covering, and self adhering ice and water membrane is the standard for good reason. That membrane seals around nail shanks and creates a continuous barrier where the two planes meet. When a crew substitutes ordinary felt, skips the membrane entirely, or runs it too narrow, the valley loses its backup layer. Membrane also needs to be centered and rolled flat, because wrinkles create channels that carry water sideways. On closed cut valleys, the cut shingle edge should be trimmed back roughly two inches from the centerline with the upper corner clipped and the end sealed. Skipping that clip leaves a sharp corner that catches water and drives it under the course above. These are small steps that take seconds and prevent years of problems.
The connection points at the top and bottom of a valley cause their own set of failures. Where a valley meets a wall, a dormer, or a chimney, the transition requires step flashing and often a kickout flashing to push water away from the siding. Missing kickout flashing is one of the most damaging defects in residential construction because it dumps concentrated valley water straight into the wall assembly. That water rots sheathing, soaks insulation, and stains interior drywall long before anyone suspects the roof. At the ridge end, the valley must be properly woven or capped so wind driven rain cannot enter at the head. Dead valleys, where a roof plane terminates against a wall with little or no slope, need a fully soldered or membrane lined pan rather than shingles. Any of these details done wrong will leak regardless of how new the shingles are. Concerned about water reaching your walls? Click here for our siding services.
Signs Your Roof Valley Is Leaking and What to Do Next
Valley leaks announce themselves in ways that are easy to misread, which is why so many go unaddressed until the damage spreads. Water entering at a valley rarely drips straight down; it follows the slope of the rafter, travels along the underside of the decking, and emerges at whatever low point it reaches first. A stain in the middle of a bedroom ceiling can easily originate from a valley twelve feet away. Knowing what to look for inside and outside the home lets you connect the symptom to the source. Timing matters too, because a leak caught in August costs a fraction of what the same leak costs after a full fall and winter of storms. The signs below appear in a fairly consistent order, and catching the earliest ones saves the most money.
Interior Signs Your Roof Valley Is Leaking
The first interior sign is usually a faint brown ring on a ceiling or a slight bubble in the paint near an exterior wall. Fresh stains have soft edges and a damp feel, while older stains develop hard rings with a defined border. Multiple rings inside one another indicate repeated wetting over several storms rather than a single event. Check the ceiling near corners and along the line where two roof planes would meet above, since those are the natural drainage paths. Nail heads pushing through drywall or ceiling texture flaking away in patches also point to sustained moisture. A musty smell in a closet or upstairs room frequently precedes any visible stain at all. Trust your nose in the days following a heavy rain. Odor often gives you a two or three month head start over a visible mark.
Attic inspection gives you the clearest picture, and it takes only a few minutes with a flashlight. Look at the underside of the roof decking directly beneath the valley line and follow it from ridge to eave. Dark streaking, water tracks, or discoloration along the rafters tells you water has been moving through. Rusted nail shanks are another reliable indicator, because clean framing nails do not rust unless they get wet. Compressed or stained insulation in a single strip usually maps the leak path exactly. Look for daylight visible at any point along the valley, which means a genuine gap in the roof assembly. Soft or spongy decking that flexes under light hand pressure indicates rot has already started. Take photos of everything you find, since those images become valuable documentation later.
Some interior signs show up in places homeowners never think to check. Water traveling from a valley can exit at a can light, a bathroom fan housing, or the top of a window casing. Peeling paint on an interior wall well below the roofline often traces back to a valley or a kickout flashing failure at the second story. HVAC equipment in the attic can sit directly in a leak path and suffer corrosion long before the ceiling shows anything. Electrical junction boxes in the attic are a serious safety concern when water reaches them. A sudden jump in cooling costs sometimes reflects wet insulation that has lost most of its thermal value. Any of these should trigger a full roof evaluation rather than a spot repair. The symptom location tells you where water exited, not where it entered.
Exterior Signs Your Roof Valley Is Leaking
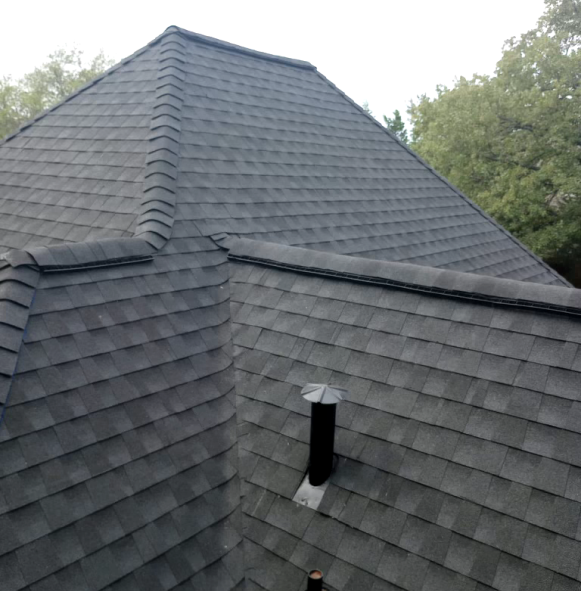
From the ground, a set of binoculars will tell you most of what you need to know without anyone climbing on the roof. Look for shingles along the valley that appear lifted, curled, or misaligned compared to the courses around them. A visibly darker or shinier stripe running the length of the valley signals heavy granule loss. Rust streaks or chalky white residue on exposed valley metal show the protective coating has worn through. Any spot where the valley metal appears buckled, dented, or separated at a lap deserves immediate attention. Hail impacts concentrate visible damage in valleys because debris and water there hold moisture against the impact points. Missing shingle tabs adjacent to the valley are a red flag that wind has already worked under the edge.
Debris accumulation itself is an exterior sign worth acting on. A valley holding a visible mat of leaves or needles is holding water at the same time. Plant growth in a valley, including grass or small weeds, means enough organic material and moisture have collected to support a root system. Moss and algae along the valley line indicate persistent dampness rather than normal weathering. Check where the valley empties into the gutter and look for a scoured or eroded spot on the shingles just above the eave. Splash marks or dirt streaks on siding below a valley termination point mean water is escaping the intended path. Fascia paint that peels in one specific location, year after year, tells the same story. These outdoor clues almost always show up before anything appears inside.
Storm activity in Tarrant and Denton counties makes exterior checks worth doing on a schedule. After every significant hail or wind event, walk the perimeter of the home and look up at each valley. Photograph anything that looks different from the previous inspection so you have a dated record. Check the ground and gutters for an unusual quantity of granules, since a heavy load of granules in the gutter often washes out of the valley first. Inspect the valley terminations for dents in the metal or crushed drip edge. If a neighbor is having roof work done after a storm, that is a strong signal your home took similar impact. Documentation gathered right after the event carries far more weight with an insurance carrier than a claim filed months later. Need a professional set of eyes on your roof? Click here for our roofing services.
What to Do Next When Your Roof Valley Is Leaking
The first priority is limiting interior damage while you arrange a proper repair. Move furniture and belongings out of the affected area and place a container under any active drip. If a ceiling is holding water and bulging, a small puncture at the lowest point releases the water in a controlled way and prevents a larger collapse. Turn off electrical circuits serving any fixture in the wet area until it has been evaluated. Do not climb onto a wet roof to place a tarp, because valley areas are slick and steep by nature. Temporary interior containment is safe; temporary rooftop work is not. Photograph everything before you clean anything up.
Next, document the timeline and the conditions. Note the date of the storm, the approximate rainfall or hail size, and when the leak first appeared. Insurance carriers evaluate claims based on a specific date of loss, and vague timelines create problems during adjustment. Save any receipts for emergency mitigation, since most policies reimburse reasonable steps taken to prevent further damage. Keep the damaged materials rather than discarding them if you plan to file. Write down what you observed in the attic along with the photos you took. Organized documentation shortens the claim process considerably.
Finally, get a professional evaluation before deciding on any course of action. A valley leak sometimes needs nothing more than a section of valley metal replaced with new membrane beneath it. Other times the valley is a symptom of a roof at the end of its service life, and patching it simply moves the leak somewhere else. An experienced roofer will check decking condition, underlayment type, fastener placement, flashing at all transitions, and the condition of the surrounding field shingles. That inspection also identifies damage the homeowner cannot see, which matters a great deal if an insurance claim is involved. Getting the diagnosis right the first time avoids paying twice for the same problem. A reputable contractor tells you plainly when a repair will hold and when it will not.
Why You Need a Roof Valley Inspection Before Fall Storm Season
North Texas moves from summer heat into an active fall storm pattern quickly, and valleys that survived the dry months often fail in the first heavy autumn rain. Summer sun bakes sealant strips, dries out caulking at flashing points, and makes aged shingles brittle along the valley cut edge. Debris from the growing season has had months to accumulate and compact in the channel. Scheduling an inspection now means any needed repair happens on your timeline rather than during an emergency. It also puts documentation in place before a storm event, which strengthens any future insurance claim. A valley inspection is a small investment that protects the entire structure beneath it.
What a Professional Roof Valley Inspection Includes
A thorough valley inspection starts on the roof surface with a close look at every valley from ridge to eave. The inspector checks shingle condition along the cut line, measures the setback from centerline, and confirms the edges are sealed and clipped correctly. Valley metal gets examined for coating wear, rust, buckling, lap separation, and improper fastening. Every transition point receives individual attention, including wall intersections, dormer connections, chimney sides, and the eave termination.
The inspection continues in the attic, where the underside of the decking tells the real story. Moisture staining, rusted fasteners, compressed insulation, and soft decking all get located and mapped against the valley line above. A moisture meter confirms active wetting versus historic staining, which changes the repair recommendation significantly. Ventilation gets checked at the same time, since poor attic airflow accelerates deck deterioration.
You should receive photographs and a written summary at the end, not a verbal opinion. Documentation lets you compare conditions year over year and gives you leverage with an insurance carrier. A quality report separates urgent items from items to monitor, so you can budget accordingly. Any contractor unwilling to put findings in writing is not giving you a real inspection.

How Roof Valley Repair Protects Your Insurance Claim
Insurance carriers distinguish between sudden storm damage and gradual deterioration, and that distinction determines coverage. A valley that failed from a documented hail or wind event is typically covered; a valley that rotted over eight years of neglect typically is not. Regular inspection records establish that your roof was in sound condition before the storm, which removes the carrier’s strongest argument for denial. Timing matters as well, since most policies require prompt reporting after a loss.
Working with a contractor who understands claims makes the process substantially smoother. Adjusters work quickly and sometimes miss valley specific damage that a roofer would document immediately. Having a roofing professional present during the adjustment ensures the scope reflects everything that was actually damaged. Supplemental items like valley metal, ice and water membrane, and drip edge are frequently omitted from initial estimates.
Repairs completed properly also protect your coverage going forward. Carriers can deny future claims when a prior repair was done incorrectly or without permits where required. Manufacturer warranties depend on installation that meets published specifications, and valley details are among the most commonly cited requirements. Keeping records of every repair maintains both your warranty and your insurability.
Why Choose TM Roofing & Construction Group for Roof Valley Repair
TM Roofing & Construction Group is locally owned and operated, and we treat every home the way we would treat our own. More than 600 Facebook reviews and BBB accreditation reflect years of work across Bedford, Hurst, Euless, Colleyville, Keller, and the surrounding communities. We back our work with lifetime manufacturer warranties and a 10 year workmanship guarantee, so the valley we build stays watertight. Our crews follow manufacturer specifications on every detail, from membrane width to fastener placement.
We specialize in insurance claims and put $500 toward your deductible, which removes a real barrier for homeowners facing storm damage. Our team meets with adjusters, documents valley specific damage thoroughly, and pursues the full scope your policy covers. Free estimates and flexible financing make it possible to address problems on your schedule instead of postponing them. We are available 24 hours a day, seven days a week, because storms do not keep business hours.
Roof valleys are the hardest working part of your roof and the least forgiving of shortcuts, which is exactly why they deserve attention from people who do this every day. Our inspections are honest, our recommendations are specific, and we tell you plainly when a repair will hold and when replacement is the better investment. Serving homeowners across Tarrant and Denton counties, we make the process simple from first phone call to final walkthrough. Call TM Roofing & Construction Group at (817) 820-9596 to schedule your free valley inspection before the next storm rolls through.