
How to Check Your Gutters Before Fall Storm Season Arrives
North Texas rain does not arrive politely. It shows up in sheets, driven sideways by wind, and it asks your gutters to move hundreds of gallons of water in under an hour. A single inch of rain on a 2,000 square foot roof produces roughly 1,250 gallons, and every drop of it has to travel through your gutter trough and out your downspouts. Late summer is the right moment to look at that system, because fall in Bedford, Euless, and Hurst brings a second severe weather season with heavy rain bands and gusty outflow winds. Gutters that sagged quietly all summer will fail loudly during the first big October storm. Debris from cedar elms, pecans, and live oaks piles up fast once the weather turns, and clogged troughs push water back under the shingle edge. The good news is that most gutter problems announce themselves early if you know where to look. A careful walk around your home, a ladder check at a few key spots, and a short list of repairs will carry your drainage system through the wettest months of the year without drama.
What to Inspect When You Check Your Gutters Before Fall Storm Season
A gutter inspection is not one task; it is a sequence of small checks that build on each other. You start at the ground because that is where failure leaves its evidence, then you move up to the roof edge where the real causes live. Most homeowners can complete the ground portion in fifteen minutes with nothing but their eyes and a garden hose. The elevated portion takes a stable ladder, dry footing, and a willingness to stop if anything feels unsafe. Pay attention to three categories as you go: physical damage to the metal, attachment strength at the fascia, and water flow through the system. Those three categories cover nearly every gutter failure our crews see across Tarrant and Denton counties. Write down what you find so you can prioritize repairs before the first cold front pushes through.
How to Check Your Gutters From the Ground
Start on a dry day and walk the full perimeter of your home, keeping your eyes on the gutter line rather than the roof. You are looking for sections that dip in the middle, sections that tilt away from the fascia board, and joints that have separated enough to show daylight. A straight gutter run should look level to the naked eye even though it carries a slight pitch toward the downspout. Any visible sag means water is pooling in that section, and standing water in a trough adds about eight pounds of weight per gallon. That extra load pulls hangers loose, opens seams, and eventually tears the whole run off the fascia during a storm. Rust streaks, peeling paint, and chalky white oxidation on aluminum all point to water sitting where it should not. Note the location of every problem section so you can inspect it closely from a ladder later.
Next, look at the ground directly beneath the gutter line and read what the soil tells you. Trenches, eroded mulch beds, splashed dirt on your siding, and matted grass all indicate water spilling over the edge instead of traveling to the downspout. Overflow marks tend to show up in the same spot year after year, which usually means a clog or a low point rather than a one time event. Check the base of each downspout for a functioning extension that carries water at least four to six feet away from your foundation. Water dumped at the wall soaks the soil, and expansive North Texas clay swells and shrinks with moisture in ways that stress slabs and footings. While you are down there, look for granules from your shingles collecting in a pile below the downspout outlet. A light amount is normal on newer roofs, but heavy granule loss signals aging shingles that deserve a closer look.
Finish the ground level pass by examining your siding, soffit, and fascia for staining. Dark vertical streaks on the face of the gutter, sometimes called tiger striping, come from dirty water running over the front lip. Rot on the fascia board or soft, sagging soffit panels means water has been getting behind the gutter for a long time, and that damage will not stop on its own. Look for peeling paint on trim, blistered caulk at window heads, and mildew growth on the wall below a joint. Inside the garage or attic, check for water stains on the framing near the eaves, since roof edge leaks often show up there first. If you find rot at the fascia, plan on addressing the wood and the drainage together because new gutters mounted to soft wood will not hold. This is also the moment to consider siding condition, since chronic overflow damages wall systems along with the trim.
How to Check Your Gutters at the Roof Edge and Fascia
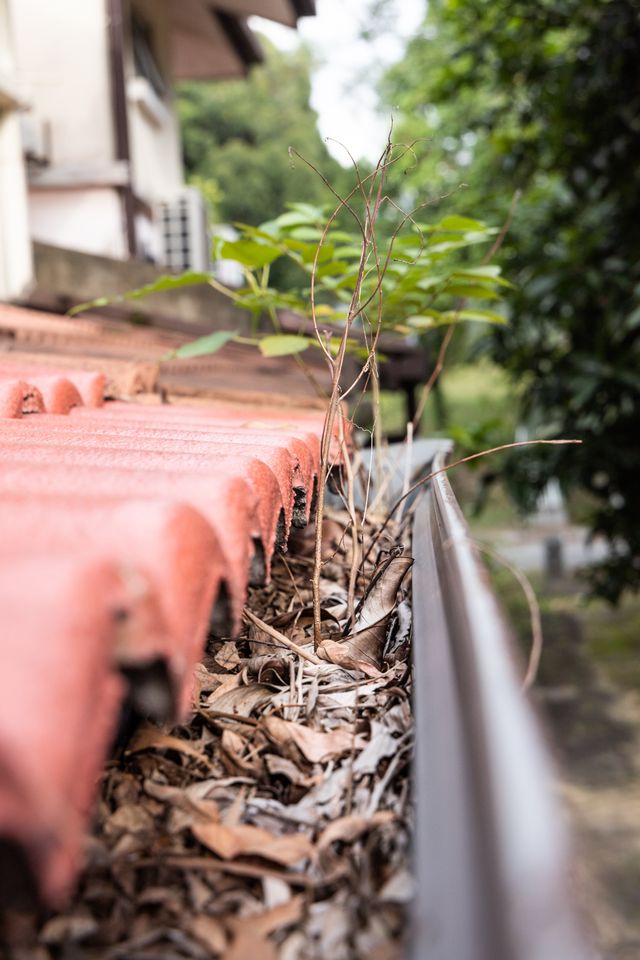
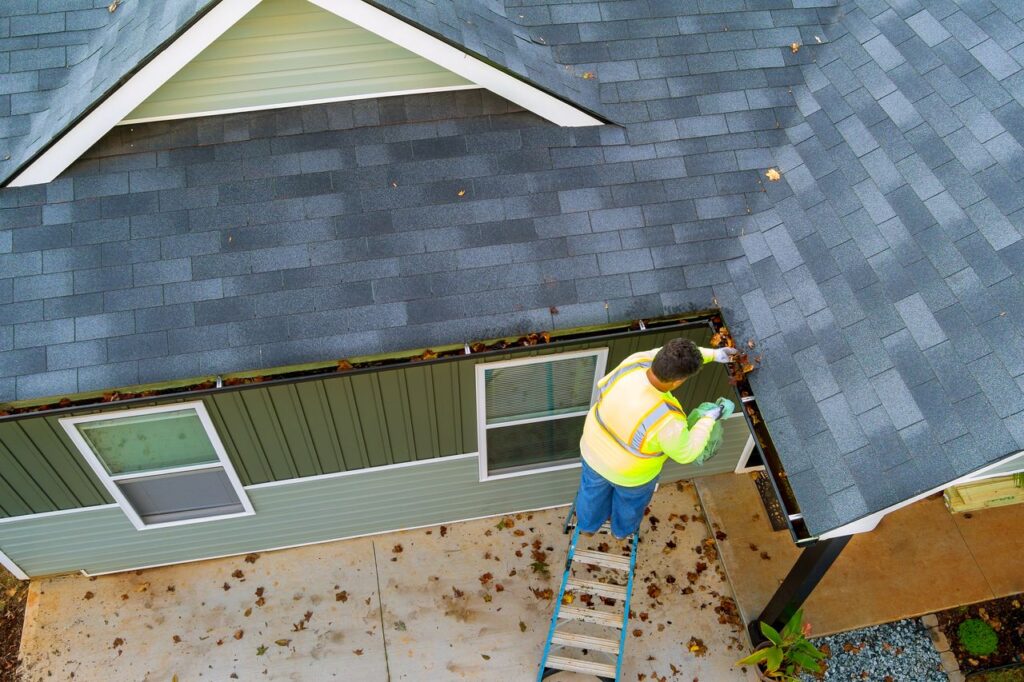
Set your ladder on firm, level ground and extend it at least three feet above the roof edge so you have something solid to hold. Never lean the ladder against the gutter itself, because aluminum troughs dent under concentrated weight and a crushed section will not drain correctly afterward. Once you are stable, look inside the trough and note how much debris has collected. Leaves, twigs, roof granules, and the fine grit that washes down over time build into a sludge layer that blocks flow long before the trough looks full. Feel the front lip for flex; a gutter that moves easily under light hand pressure has lost its structural support. Check the hangers, which should be spaced roughly every 24 to 36 inches along the run and closer in areas that see heavy water volume. Missing or pulled hangers are the single most common reason gutters fail during a wind driven rain event.
Now shift your attention to the connection between the roof and the gutter, because that transition point decides where water ends up. You should see drip edge flashing extending from beneath the shingles and over the back lip of the gutter, directing runoff into the trough rather than behind it. Homes built without drip edge or with a gutter apron that has been bent out of position let water track backward onto the fascia board. Look for gaps between the shingle edge and the trough where light shows through, and check that the shingle overhang extends far enough past the fascia. On older homes across Richland Hills and Haltom City, we regularly find gutters installed too low relative to the roof plane, which allows fast moving water to shoot straight over the front lip during heavy rain. That problem cannot be solved by cleaning; it requires repositioning the gutter or adding flashing at the eave.
Give the seams and end caps a careful look while you are up there, since these are the weakest points in any sectional gutter system. Sealant at inside corners, outside corners, and joints dries out under Texas sun exposure and cracks within five to ten years. Press gently on each seam and watch for movement or flaking sealant, and check end caps for pinholes and rust at the crimp. Seamless gutters formed onsite have far fewer joints, but they still have sealed corners and outlets that need attention. If your home has multiple roof planes draining into a single gutter run, that section carries more volume than the rest and deserves extra scrutiny. Note every failed seam on your list, because one small drip will become a steady stream once the fall rains start. Ready to have a trained crew handle the elevated work for you? Click here for our gutter services and schedule a free estimate.
How to Check Your Gutters for Slope and Drainage Performance
Proper gutter slope is subtle by design, which is exactly why so many homes have it wrong. The industry standard calls for roughly a quarter inch of fall for every ten feet of run, angled toward the nearest downspout. Too little pitch leaves standing water that breeds mosquitoes and stresses the hangers; too much pitch looks crooked and overshoots the outlet during heavy flow. You can check pitch with a level laid inside the trough, or more simply by pouring a bucket of water at the far end and watching where it goes. Water should move steadily toward the outlet without pausing or pooling in the middle. If it stalls, mark that spot and plan to reset the hangers in that section. Long runs exceeding forty feet often need a high point in the middle with downspouts at both ends to move water fast enough.
Downspout capacity matters just as much as trough pitch, and it is the piece most homeowners overlook entirely. A standard residential setup pairs 5 inch K style gutters with 2 by 3 inch downspouts, which handles typical roof loads on smaller homes. Larger roofs, steep pitches, and homes with valleys that concentrate runoff usually need 6 inch gutters paired with 3 by 4 inch downspouts to keep up with intense rainfall. The general rule places one downspout for every 20 to 35 feet of gutter run, adjusted for the roof area draining into that section. If your home has a single downspout serving a long run along the back elevation, that outlet is almost certainly a bottleneck during a heavy storm. Undersized drainage shows itself as overflow at the same corner every time it rains hard.
Test the whole system with a garden hose before you call the inspection finished. Run water into the far end of each gutter run and watch the flow at the downspout outlet, timing how long it takes to appear. A healthy system delivers water almost immediately with strong volume at the bottom of the downspout. Weak trickles, gurgling sounds, or water backing up at the outlet all point to a clog inside the vertical section, frequently at the elbow where the downspout turns. Tap along the length of the downspout with your knuckles and listen for the dull thud that indicates packed debris rather than the hollow ring of an empty tube. Clear those blockages now, because a plugged downspout turns your entire gutter run into a bathtub during the first serious fall storm.
What to Clean and Repair on Your Gutters Before Fall Storm Season
Inspection tells you what is wrong; the repair list is where you actually protect your home. Prioritize work that affects water flow first, then attachment strength, then cosmetic concerns. A clean trough with solid hangers and clear downspouts will outperform a beautiful gutter system that drains poorly. Most homes need a combination of cleaning, resealing, and hanger replacement rather than a full tear off. Budget a full day for a typical single story home if you are doing the work yourself, and considerably more if you have multiple stories or steep roof access. Timing matters too, since completing repairs in late summer means the system is ready before leaf drop and the first strong cold front. Waiting until October puts you in line behind every other homeowner in the metroplex who had the same idea.
Cleaning Your Gutters the Right Way Before Fall Storm Season
Cleaning starts with removal, not rinsing, because spraying a packed trough just pushes debris into the downspout and creates a worse blockage. Wear gloves, work from a stable ladder, and scoop material out by hand or with a plastic gutter scoop into a bucket hung from the ladder. Move the ladder frequently rather than reaching sideways, since overreaching causes the majority of ladder accidents. Work in sections of three to four feet, clearing the trough down to bare metal so you can see the actual condition of the gutter floor. Pay special attention to the area immediately around each downspout outlet, where debris packs tightest. Dispose of the material rather than dropping it into flower beds, because wet leaf sludge smothers plants and stains hardscape.
After the bulk debris is out, flush the trough with a hose starting at the end farthest from the downspout. This second pass removes the fine grit and shingle granules that a scoop leaves behind, and it lets you verify slope at the same time. If water pools anywhere, you have found a section needing hanger adjustment. Follow the flush by checking each downspout outlet for full flow, and clear any elbow blockage with a plumber’s snake or by disassembling the lower elbow. Some homes require removing the bottom section entirely to reach compacted debris that has settled at the turn. Reassemble and test again until water moves through freely.
Frequency depends on your tree cover more than the calendar. Homes in mature neighborhoods across Colleyville, Southlake, and Grapevine with heavy canopy typically need cleaning twice a year at minimum, once in late spring and again in late fall. Properties with pecans or live oaks directly overhanging the roof often need three or four visits, since those species drop material almost continuously. Homes with little tree cover may get by with a single annual cleaning, though roof granules and windblown debris still accumulate over time. Gutter guards reduce the frequency but do not eliminate maintenance, because fine debris still passes through most screen designs and collects underneath. Set a recurring reminder rather than waiting for overflow to remind you.
Repairing Gutter Seams, Hangers, and Downspouts Before Fall Storm Season
Seam repair is straightforward but demands preparation, and skipping the prep is why most homeowner sealant jobs fail within a season. Scrape out the old sealant completely, clean the metal with a solvent that removes oxidation and oils, and let the surface dry fully before applying anything new. Use a gutter grade sealant rated for exterior metal and temperature swings, not general purpose silicone from a hardware aisle. Apply from inside the trough where water contacts the joint, tooling the bead so it bridges the seam without creating a dam. Give the sealant its full cure time before testing with water, which usually means 24 to 48 hours depending on humidity. A properly prepared seam will hold for years; a rushed one will peel by Thanksgiving.
Hanger replacement is the highest value repair on most homes, and modern hidden hangers make the job far more reliable than the old spike and ferrule systems they replace. Spikes work loose as fascia wood expands and contracts, which is why so many older gutters sag in the middle of long runs. Hidden hangers screw directly into the fascia with a structural screw and grip the front lip of the gutter, distributing load across the trough profile. Space them every 24 to 36 inches, and tighten spacing to 18 inches in valleys and other high volume areas. If the fascia board is soft where the screw seats, that wood must be replaced first because a screw in rotten lumber will pull out under load. This is the point where many homeowners discover that a gutter problem is really a roof edge problem. Suspect the damage runs deeper than the gutters themselves? Click here to learn about our roofing services and have the eave assembly evaluated properly.
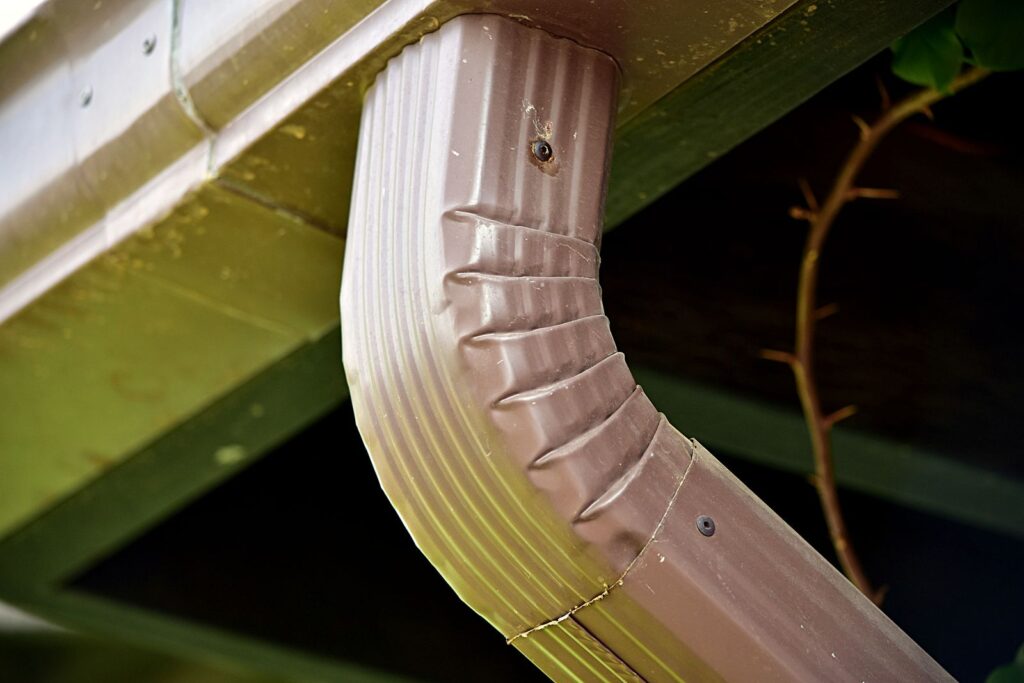
Downspout work rounds out the repair list and often delivers the biggest improvement in drainage performance. Reattach loose straps, replace crushed sections, and add a downspout where a long run is clearly overwhelmed. Extensions should carry water a minimum of four feet from the foundation, with six feet or more preferred on homes with negative grade or clay soil that holds moisture. Underground drain lines are an option on properties where surface extensions create trip hazards, though they require periodic flushing to stay clear. Secure every elbow with screws or rivets rather than relying on friction fit, since wind driven rain separates loose joints. Test the completed system with a hose before you consider the project finished.
When to Replace Your Gutters Instead of Repairing Them Before Fall Storm Season
Repair makes sense until the underlying material gives out, and there are clear signals that a system has reached that point. Widespread rust perforation, cracks running along the trough bottom, and metal that flexes like foil all indicate a gutter past its service life. Aluminum gutters typically last 20 to 30 years in North Texas, with steel and copper lasting longer and vinyl considerably less. Hail damage accelerates that timeline dramatically, since dents in the trough floor create low spots that hold water permanently. If you count more than a handful of separate failures across a single run, replacement usually costs less than chasing repairs one at a time. Old sectional systems with joints every ten feet are particularly poor candidates for extensive repair work.
Replacement is also the right call when the existing system was sized wrong from the start. A home with 5 inch gutters that overflows every single storm does not have a maintenance problem; it has a capacity problem that cleaning will never solve. Upgrading to 6 inch seamless gutters with 3 by 4 inch downspouts increases carrying capacity substantially and reduces clog frequency because the larger outlet passes debris more easily. Roof modifications, added additions, and converted patio covers all change drainage patterns in ways the original gutters were never designed to handle. An honest evaluation should compare repair cost against replacement cost over a realistic timeline. Sometimes spending more now genuinely costs less over the next decade.
Timing a replacement before fall storm season carries practical advantages beyond peace of mind. Installation crews have better availability in late summer than they do after the first major storm, when demand spikes across the entire metroplex. Dry weather also produces better sealant adhesion and safer working conditions on the roof edge. Pairing gutter replacement with fascia repair or roof work reduces overall labor cost since crews are already staged at the eave. If your roof is approaching replacement age, coordinating both projects prevents paying twice for the same access and setup. Plan the sequence deliberately rather than reacting to a leak in the middle of a downpour.
Why You Need a Professional Gutter Inspection Before Fall Storm Season
Homeowner inspections catch obvious problems, and that is genuinely valuable. What they miss are the subtle conditions that turn into expensive repairs: improper drip edge integration, hidden fascia rot behind the gutter, and capacity shortfalls that only reveal themselves during peak rainfall. A trained inspector evaluates the entire eave assembly as a system, checking how the roof, flashing, gutter, fascia, and soffit work together. That perspective matters most on homes that have had previous repair work by different contractors over the years. Professional inspection also creates documentation, which becomes important if a storm damage insurance claim follows later. Getting that assessment done before the weather turns puts you ahead of the problem rather than behind it.
What a Professional Gutter Inspection Covers Before Fall Storm Season
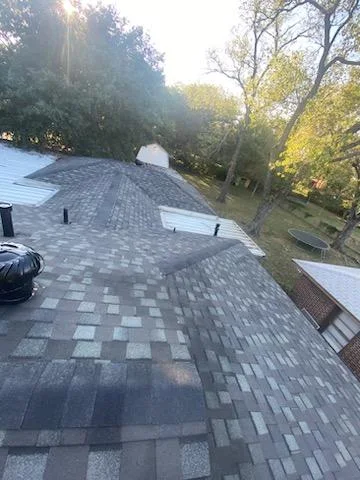
A thorough inspection begins on the roof, not on a ladder at the edge, because drainage problems frequently originate several feet upslope. Inspectors check valley conditions, shingle overhang, drip edge placement, and the transition where roof planes concentrate runoff. They document hanger spacing, trough pitch, seam integrity, and downspout sizing against the actual roof area draining into each section. Fascia and soffit get probed for soft spots that indicate moisture intrusion behind the gutter line. Every finding is recorded with location notes and photographs.
The evaluation continues at the ground with grading, extension placement, and evidence of past overflow patterns. Soil erosion, foundation staining, and moisture at the slab edge all tell a story about how the system has performed historically. Inspectors compare that evidence against the current configuration to identify recurring failure points. On homes with prior storm damage, they look specifically for hail dents in the trough floor and impact marks on downspout faces. That documentation supports an insurance conversation when one is warranted.
The result is a prioritized action plan rather than a vague list of concerns. Items get sorted into urgent repairs, seasonal maintenance, and longer term planning so you can budget accordingly. A good inspector explains the reasoning behind each recommendation and shows you the evidence. You should finish the visit understanding your own home better than you did before. Live in one of our core service areas? Click here for details on our work in Bedford and the surrounding communities.

What Gutter Failure During Fall Storm Season Actually Costs
The cheapest gutter failure is the one you catch in August. Overflow that soaks a fascia board for one season means replacing a few boards; overflow that continues for three seasons means rebuilding the eave, replacing soffit panels, and repairing the roof deck edge. Water that reaches the wall cavity damages sheathing, insulation, and interior finishes at costs that dwarf any gutter repair. Foundation movement from saturated clay soil sits in an entirely different price category. Every one of those outcomes traces back to water that failed to reach a downspout.
Secondary damage compounds quietly, which is what makes it dangerous. Chronic moisture at the eave invites wood destroying insects and creates conditions for mold growth in the attic. Wet soffit panels block ventilation intake, which raises attic temperatures and shortens shingle life across the entire roof. Ice is rarely the issue in North Texas, but the freeze events we do get find every weakness in a water logged eave assembly. Small problems rarely stay small when water is involved.
Insurance adds another layer worth understanding clearly. Carriers generally cover sudden storm damage while excluding damage attributed to deferred maintenance. A gutter torn off by straight line winds is a different claim than a fascia that rotted over four years of overflow. Documented maintenance strengthens your position considerably if a claim becomes necessary. That documentation costs almost nothing to create and can matter enormously later.
Why Choose TM Roofing & Construction Group for Your Gutter Inspection
TM Roofing & Construction Group has built its reputation on doing the unglamorous work correctly, and gutters are exactly that kind of work. We are locally owned and operated, backed by more than 600 Facebook reviews and BBB accreditation earned through consistent results across Tarrant and Denton counties. Our crews treat your home the way we treat our own, which means we clean up, we explain what we found, and we do not sell you work you do not need. Free estimates are standard, and we are available 24 hours a day when a storm creates an emergency. Flexible financing options are available for larger projects.
Our work is protected by lifetime manufacturer warranties on materials and a 10 year workmanship guarantee on installation. That combination matters because most gutter and roofing failures trace back to installation error rather than product defect. We also specialize in insurance claims, and we contribute $500 toward your deductible on qualifying claim work. Our team handles the documentation, communicates with adjusters, and keeps you informed at every stage. You get one point of contact from inspection through completion.
Fall storm season is coming, and the homes that handle it well are the ones that prepared in August. A quick inspection now costs you nothing and may save you thousands in eave, siding, and foundation repair down the road. We serve Bedford, Hurst, Euless, Colleyville, Grapevine, Southlake, Keller, North Richland Hills, Irving, Lewisville, and communities throughout the metroplex. Call TM Roofing & Construction Group at (817) 820-9596 to schedule your free gutter inspection, and let our team make sure your drainage system is ready before the first heavy rain arrives.